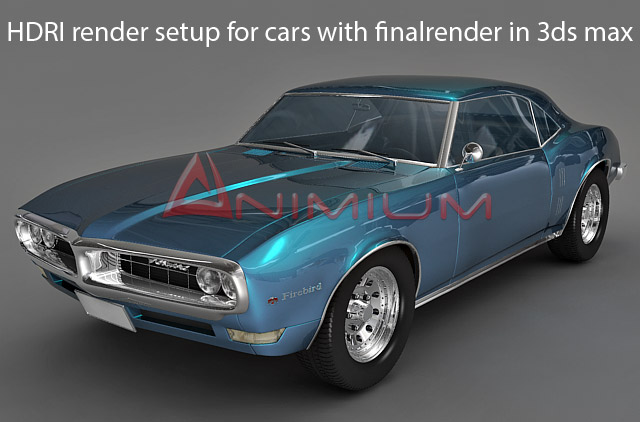
HDRI render setup for cars with finalrender in 3ds max
6. Now copy the bitmap from material editor and open the Environment and Effects dialog by pressing 8 on your keyboard. Then do a paste instance on the environment map button.![]()
![]()

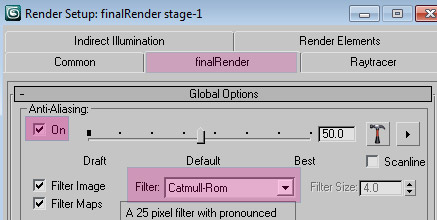
7. Then press F10 to open the render setup dialog, and use the following settings.
a. Click on finalrender tab and under Global Options roll out, switch on Anti-Aliasing, and select Catmull-Rom as the filter. which will give a sharp render, but you can use different filters based on your requirements.
b. Click on Indirect Illumination tab and under Skylight rollout, switch on Sky Type and select Simple Sky. Also copy the bitmap( step 4 ) from the material editor and do a paste instance in to the slot available next to the color setting. This map will act as a light source for rendering the scene.

Also remember that you no need to paste the HDR map here in case you want a different colors and settings for lighting the scene.
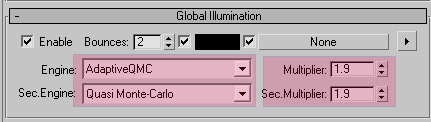
c. Under Global Illumination roll out select Adaptive QMC as Engine and Quasi Monte Carlo as secondary engine. then set the Multiplier and Sec. Multiplier, this is the light intensity setting.
d. Now hit render, you should get a render with lighting and reflections if proper materials were assigned.
Notes:
You play with other settings and find a better one for your scene. Also play with material settings and fine tune it further. You can experiment with the HDRI setup from various car models available here, most of them are provided with render setup on finalrender in 3ds max 2009.