Animate with Reaction Manager in 3ds max
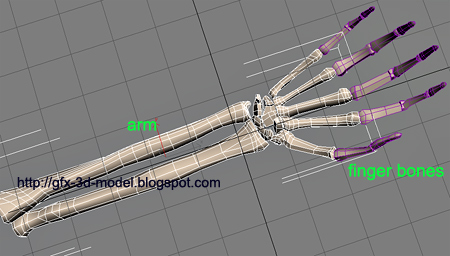
This file contains 3d model of skeletal structure of human arm.

In our setup we have an object called "arm" that will act as a master that controls the bones of fingers.
1. Open the 3ds max file arm.max (Compatible with 3ds max 8 and above).
2. Select the arm object and add an Attribute Holder modifier from the Modifier panel.
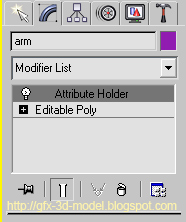
3. With the arm object still selected, select Animation -> Parameter Editor from the menu. This will open the Parameter Editor Dialog.
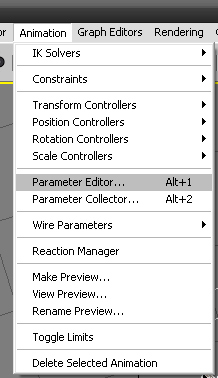
4. In the Parameter Editor dialog, set the parameters with the following settings
Parameter Type : Float
UI type : Slider
Name : Index Finger
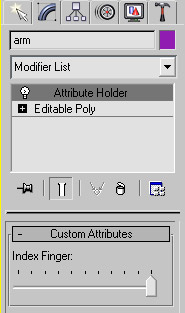
and then click add. This will add a new attribute to the Attribute Holder panel. You can check by selecting the arm object and go to modifier panel. You can see the attribute named Index Finger in the panel. (see image below)
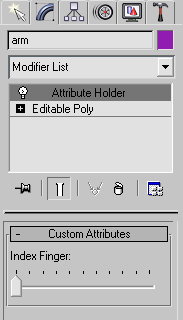
Now we have set up the Master that will control the finger bones. This slider Index Finger that we just added will be our master. If we slide all the way to the end the bones of index finger must close and when we slide it to its default position the bones of index finger must open.
5. Now Open Reaction Manager from the menu, Animation -> Reaction Manager. This will open Reaction Manager Dialog.
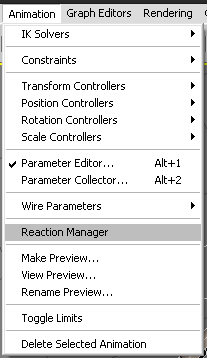
Reaction Manager Dialog has the following buttons on the top . Add Master, Add Slave and Add Selected to add Master and slave objects to Reaction Manager.
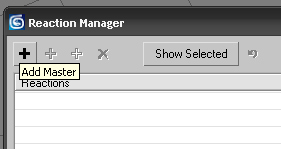
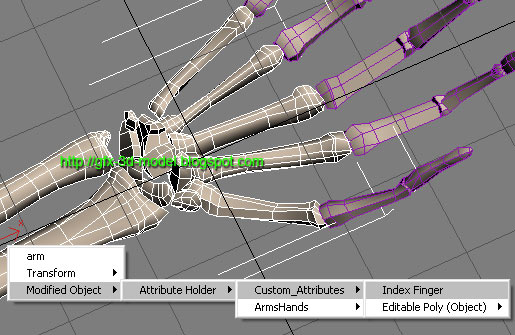
This step will add the Index Finger slider that we applied on the arm object as Master in Reaction manager.
Now we must add slaves. We are going to add the three objects(bone1, bone2, bone3) that make up the index finger.
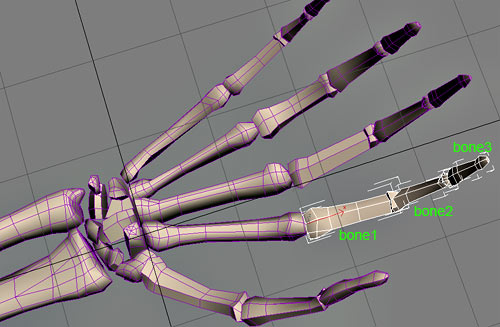
7. Select the three objects (bone1, bone2, bone3) and click on Add selected in Reaction manager, a menu will appear again from which you select the following in sequence.

We are going to rotate the bones on Y axis, so we selected it on Y rotation. You can select whatever parameter you want according to your need.
Now we have added Master(Index Finger- Slider) and Slaves(bone1, bone2, and bone3) to Reaction Manager. Now the slider is used to animate the bones which we are going to do in the coming steps. Before that have look at the Reaction Manager panel (refer image below).
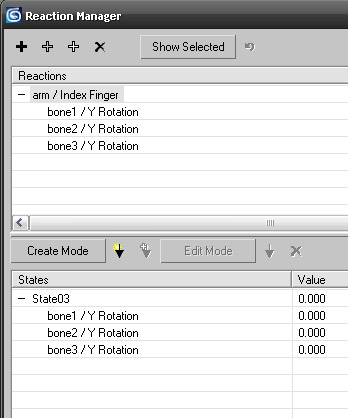
Any animation using Reaction Manager involves different state of objects, for example in our case opening and closing of fingers. So as soon as you added the slaves, Reaction Manager creates a default state which is open state in our animation. Now we are going to create closing of index finger by creating another state, and the closing of finger will be controlled by slider(Index Finger).
8. Now click on Create Mode button in Reaction Manager.
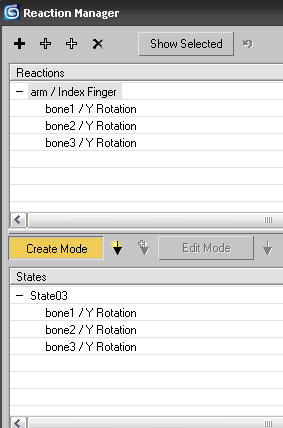
9. Now select the arm object in viewport and from the modifier panel of arm object, drag slider Index finger to the end. (refer image below)
10. Now rotate the the three objects (bone1, bone2, bone3) on Y axis as shown in the image. Rotate each bone aroud 60 degrees on Y axis.
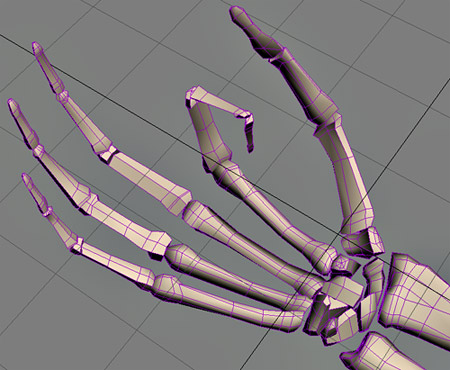
Note: the Create Mode Button should be switched on through the 9th and 10th steps.
Now we have dragged the slider to the end and rotated the bones, this is 2nd state of the object and slider.
11. Now click on Create State button(downward arrow) next to Create Mode button.
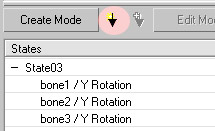
12. Now exit the Create Mode by clicking on the Create Mode button once again.
Now you can notice two states of the Slave objects we added.
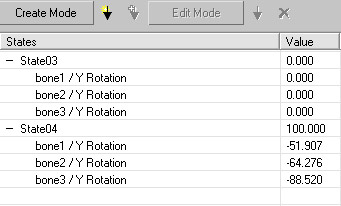
Now drag the slider and watch the finger animate accordingly.
This same process can be used in animation of mechanical and robotic arms.
Here I have shown you to animate the index finger, follow the same steps for other fingers and complete the animation. You can download the completed version of the file here: arm_finished.max

