Translucent Shader in 3ds max
Lighting and Rendering is a complex task in 3D animation as it involves proper understanding of the behaviour of light and its interaction with objects in the environment. Some of the complex lighting involves Raytracing, Reflection, Global Illumination, Ambient Occlusion, Translucency etc.
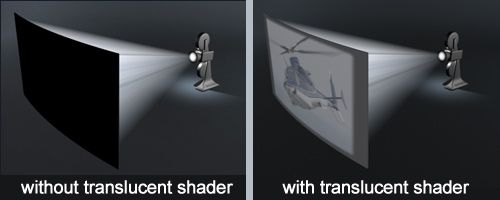
The Translucent shader in 3ds Max helps in the simulation of objects like lamp shades and screens on which slides and movies are projected. Translucent shader allows light to pass through so we can see the image at the back of the object. We can also make shadows to be projected with the help of translucent shader as illustrated in the sample image.
Translucent shader also works with projected images with the help of spot light as in this tutorial, we will work an example to understand the idea of how Translucent shader works in 3ds Max.
1. Create a plane in Front viewport of 3ds Max with the following units - Length 100 and width 200. This plane is our movie screen.
2. Now open the Material Editor (press M) and assign the first material to the plane.
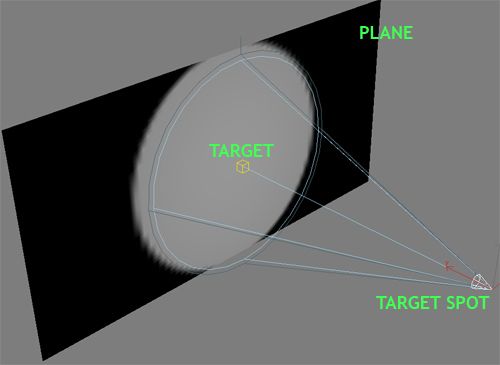
3. Create a Target spot light in the top viewport the and place the target on the screen. (ref image).
We created a Spotlight with circular cone, so the light projected on the plane is circular. We will change that to rectangular projection as we see in movie projectors.
4. Select the Spotlight that we have created (Spot01) and under modify tab, go to Spotlight Parameters and select Rectangle. (ref image)
Now lets project an image on the plane with the help of Spotlight we have created.
5. Select Target Spot and in the modifiers tab, open the Advanced Effects rollout and click the button "None" under Projector Map. (ref image)
6. Now in the Material/Map Browser select Bitmap and choose some image to be used as a projector map. Now render the viewport and you can see the image that you selected is being projected on the plane. (ref image).
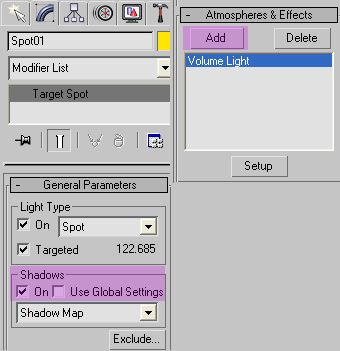
7. Now let us throw some light streaks as we see in the cinema projectors for some realistic effect. Now select Target spot and switch on the shadows. Next go to Atmosphere & Effects rollout and click add, and select Volume Light. Volume Light will color the light that comes out from the target spot with the colors from the image we used for Projector Map. (ref images below)
8. Now lets go to the Translucent Shader part. Render from the angle where you can see the back side of plane (screen). You will not be able to see the projected image on the plane, because 3dsmax standard material with Blinn, Phong and other shader types except Translucent Shader will not allow the light to pass through unless you use opacity and Raytrace options. Translucent shader gives the effect of thin cloth or membrane like setup for the object on which Translucent shader is used without any extra cost in render time and setup.
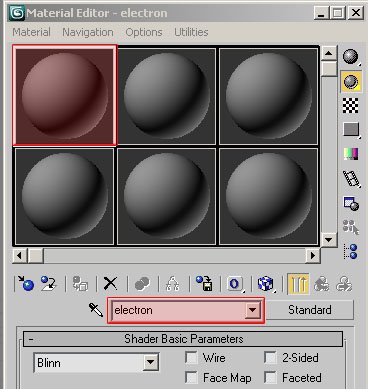
9. In the material editor select the material you assigned to the Plane (screen) and under Shader Basic parameters change the shader type to Translucent shader. then under the Translucent Basic Parameters rollout change the Translucency Color from black to grey and render the image. Now you can see the difference. (ref images).
10. You can see the two renders without and with Translucent shader.
work files: [download id="16715"]


