Creating Realistic Chrome in 3ds Max
Creating reflective surfaces like Car paint, Chrome, Glass often involves Raytracing in any 3D Software. We come across Chrome effects in most of the renders both interior and exterior.
Let's see an easy and simple way of creating Chrome material in 3ds max.
1. Take an empty material slot in 3ds max (Press M to open the material editor interface)
then apply the following settings under Shader Basic Parameters.

Ensure you have the settings illustrated in the image.
a. Shader - Phong
b. For Diffuse Color use the following setting. Click on the color box and use RGB(45,45,45), you will get a dark grey color.
c. Specular Level - 121 and Glossiness to 28.
2. Under Maps Rollout, click on the button labelled "None" in the Reflection Slot and select Raytrace from the Material/Map Browser dialog.
 set the Reflection Value to 84. There is no limit on this value. But 84 works well for chrome objects like car rims, grills etc. Lower values will not give you good reflection. Use value 100 for headlight chrome effects.
Now you are set, apply the material on some object. Now you need some environment for reflection. You may use HDRI images or you can use the following script "Reflect Maker" to create reflection planes.
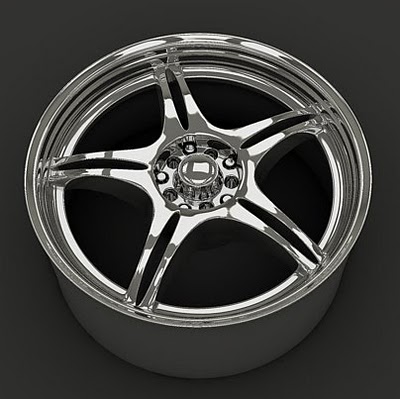
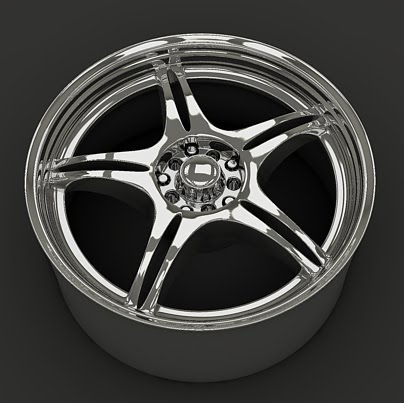
Here is a rendered image with the above settings.
Hope you like this tutorial.