Spline modeling in 3ds max
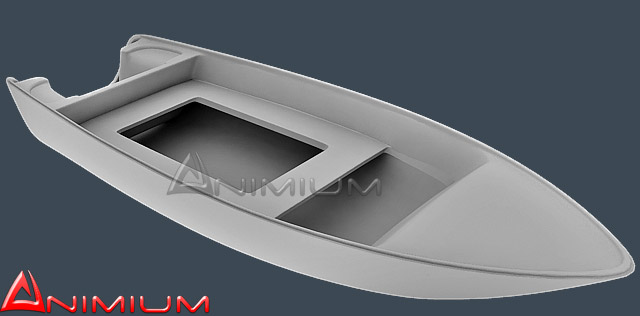
3D Modeling using any 3d software requires a lot of skill and concentration, above all you must employ different modeling techniques for different modeling situations. This tutorial is intended to give a basic idea on spline modeling. We will be modeling a basic shape of the boat with splines, but this modeling technique can be used in creating various other 3d models.
You can start with this file [download id="16902"], splines were drawn and arranged in the shape of the boat. You can see three splines arranged one below the other. Now these three splines will be used to create the basic shape of the boat.
[tabgroup]
[tab title="Step 1"]
Now in the perspective viewport select shape01 and go to Modifier tab and under Geometry rollout click on the attach button.
[toggle_simple title="Reference Image - Step 1" width="Width of toggle box"]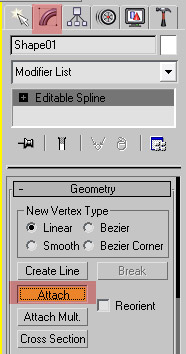 [/toggle_simple]
[/tab]
[tab title="Step 2"]
Now click on the splines Shape02 and Shape03. This will attach the remaining two splines to the spline Shape01. Now in the modifier tab, under Geometry rollout click on Cross Section button.
[toggle_simple title="Reference Image - Step 2" width="Width of toggle box"]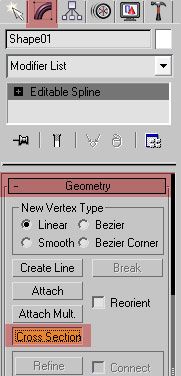 [/toggle_simple]
[/tab]
[tab title="Step 3"]
With the Cross section button enabled, click the splines one by one. Click on Shape01 and then click on Shape02 and finally Shape03. You will see cross section being created when you click on the splines.
[toggle_simple title="Cross Section Created" width="Width of toggle box"]
[/toggle_simple]
[/tab]
[tab title="Step 4"]
Now select the Cross Section and from the modifier list select Surface Modifier. This will generate the surface over the cross section. In the Surface modifier, under Patch Topology set the Steps value to 0.
[toggle_simple title="Surface modifier applied" width="Width of toggle box"]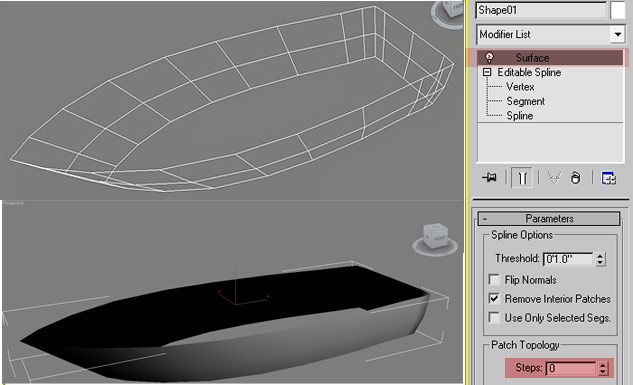
[/toggle_simple]
[/tab]
[tab title="Step 5"]
Now right click on the Surface modifier and select Collapse all from the Quad menu. The surface will be converted to Editable patch. Then right click on the Editable patch in the viewport and convert it into Editable poly.
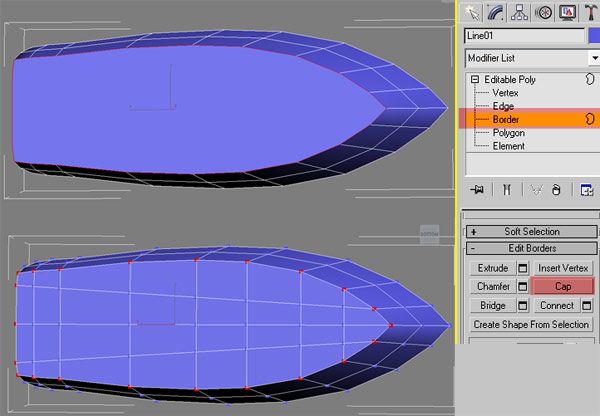
Once it is converted into Editable poly, click on the Border sub-object and select the border at the bottom of the object.
[toggle_simple title="Border Selection" width="Width of toggle box"]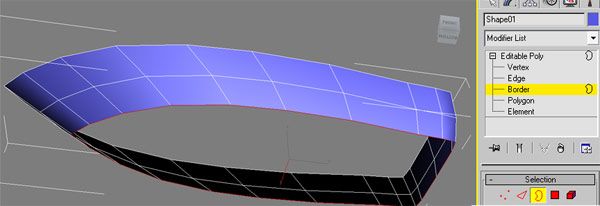
[/toggle_simple]
[/tab]
[tab title="Step 6"]
Now click on Cap button to close the border, then connect the vertices as shown in the image. This will create a smooth surface when applying Meshsmooth modifier.
[toggle_simple title="Border Cap" width="Width of toggle box"]
[/toggle_simple]
[/tab]
[tab title="Step 7"]
No we have the basic shape, but the interior of the boat shows the backside of the polygon, which will be invisible or appear dark. So now you apply Shell modifier to create the interior surface of the boat.
[toggle_simple title="Shell Modifier Applied" width="Width of toggle box"]
[/toggle_simple]
[/tab]
[tab title="Step 8"]
You can take it further with your polygon editing tools. You can create interior, cockpit glass, rear propeller and motor to make it realistic.
Here is the completed model: [download id="16904"]
[/tab]
[/tabgroup]

